иЎЁйқўзқҖиүІеҷЁзӨәдҫӢ
иҝҷйҮҢеҲ—дёҫдәҶдёҖдәӣиЎЁйқўзқҖиүІзҡ„зӨәдҫӢгҖӮдёӢж–Үдёӯзҡ„зӨәдҫӢдҫ§йҮҚдәҺдҪҝз”ЁеҶ…зҪ®е…үз…§жЁЎеһӢгҖӮжңүе…іеҰӮдҪ•е®һзҺ°иҮӘе®ҡд№үе…үз…§жЁЎеһӢзҡ„зӨәдҫӢпјҢиҜ·еҸӮйҳ…иЎЁйқўзқҖиүІеҷЁе…үз…§зӨәдҫӢгҖӮ
з®ҖеҚ•
жҲ‘们е°Ҷд»Һйқһеёёз®ҖеҚ•зҡ„зқҖиүІеҷЁејҖе§ӢпјҢ然еҗҺеңЁжӯӨеҹәзЎҖдёҠжј”зӨәе…¶д»–зӨәдҫӢгҖӮиҝҷжҳҜдёҖдёӘд»…е°ҶиЎЁйқўйўңиүІи®ҫзҪ®дёәвҖңзҷҪиүІвҖқзҡ„зқҖиүІеҷЁгҖӮе…¶дҪҝз”ЁеҶ…зҪ® LambertпјҲжј«еҸҚе°„пјүе…үз…§жЁЎејҸгҖӮ
Shader "Example/Diffuse Simple" { SubShader { Tags { "RenderType" = "Opaque" } CGPROGRAM #pragma surface surf Lambert struct Input { float4 color : COLOR; }; void surf (Input IN, inout SurfaceOutput o) { o.Albedo = 1; } ENDCG } Fallback "Diffuse" }иҝҷжҳҜе®ғеңЁи®ҫзҪ®жңүдёӨз§ҚзҒҜе…үзҡ„жЁЎеһӢдёҠзҡ„ж ·еӯҗпјҡ
зә№зҗҶ
дёҖдёӘзәҜзҷҪиүІзҡ„еҜ№иұЎжҳҫеҫ—йқһеёёеҚ•и°ғпјҢи®©жҲ‘们添еҠ дёҖдёӘзә№зҗҶгҖӮжҲ‘们е°ҶдёәзқҖиүІеҷЁж·»еҠ дёҖдёӘеұһжҖ§еқ—пјҢиҝҷж ·еңЁвҖңжқҗиҙЁвҖқ(Material) дёӯе°ұдјҡжңүдёҖдёӘзә№зҗҶйҖүжӢ©еҷЁгҖӮе…¶д»–жӣҙж”№еңЁдёӢж–Үдёӯд»ҘзІ—дҪ“жҳҫзӨәгҖӮ
Shader "Example/Diffuse Texture" { Properties { _MainTex ("Texture", 2D) = "white" {} } SubShader { Tags { "RenderType" = "Opaque" } CGPROGRAM #pragma surface surf Lambert struct Input { float2 uv_MainTex; }; sampler2D _MainTex; void surf (Input IN, inout SurfaceOutput o) { o.Albedo = tex2D (_MainTex, IN.uv_MainTex).rgb; } ENDCG } Fallback "Diffuse" }
жі•зәҝиҙҙеӣҫ (Normal Mapping)
и®©жҲ‘们添еҠ дёҖдәӣжі•зәҝиҙҙеӣҫ (normal mapping)пјҡ
Shader "Example/Diffuse Bump" { Properties { _MainTex ("Texture", 2D) = "white" {} _BumpMap ("Bumpmap", 2D) = "bump" {} } SubShader { Tags { "RenderType" = "Opaque" } CGPROGRAM #pragma surface surf Lambert struct Input { float2 uv_MainTex; float2 uv_BumpMap; }; sampler2D _MainTex; sampler2D _BumpMap; void surf (Input IN, inout SurfaceOutput o) { o.Albedo = tex2D (_MainTex, IN.uv_MainTex).rgb; o.Normal = UnpackNormal (tex2D (_BumpMap, IN.uv_BumpMap)); } ENDCG } Fallback "Diffuse" }
иҫ№зјҳе…үз…§ (Rim Lighting)
зҺ°еңЁпјҢиҜ•зқҖж·»еҠ дёҖдәӣиҫ№зјҳе…үз…§ (Rim Lighting) д»Ҙй«ҳдә®жҳҫзӨәеҜ№иұЎзҡ„иҫ№зјҳгҖӮжҲ‘们е°ҶеҹәдәҺиЎЁйқўжі•зәҝдёҺи§Ҷзәҝж–№еҗ‘д№Ӣй—ҙзҡ„и§’еәҰж·»еҠ дёҖдәӣеҸ‘е°„е…үгҖӮдёәжӯӨпјҢжҲ‘们е°ҶдҪҝз”Ё viewDir еҶ…зҪ®иЎЁйқўзқҖиүІеҷЁеҸҳйҮҸгҖӮ
Shader "Example/Rim" { Properties { _MainTex ("Texture", 2D) = "white" {} _BumpMap ("Bumpmap", 2D) = "bump" {} _RimColor ("Rim Color", Color) = (0.26,0.19,0.16,0.0) _RimPower ("Rim Power", Range(0.5,8.0)) = 3.0 } SubShader { Tags { "RenderType" = "Opaque" } CGPROGRAM #pragma surface surf Lambert struct Input { float2 uv_MainTex; float2 uv_BumpMap; float3 viewDir; }; sampler2D _MainTex; sampler2D _BumpMap; float4 _RimColor; float _RimPower; void surf (Input IN, inout SurfaceOutput o) { o.Albedo = tex2D (_MainTex, IN.uv_MainTex).rgb; o.Normal = UnpackNormal (tex2D (_BumpMap, IN.uv_BumpMap)); half rim = 1.0 - saturate(dot (normalize(IN.viewDir), o.Normal)); o.Emission = _RimColor.rgb * pow (rim, _RimPower); } ENDCG } Fallback "Diffuse" }
з»ҶиҠӮзә№зҗҶ (Detail Texture)
дёәе®һзҺ°дёҖз§ҚдёҚеҗҢзҡ„ж•ҲжһңпјҢи®©жҲ‘们添еҠ дёҖдёӘдёҺеҹәзЎҖзә№зҗҶ (base texture) з»“еҗҲзҡ„з»ҶиҠӮзә№зҗҶ (detail texture)гҖӮз»ҶиҠӮзә№зҗҶ (detail texture) дҪҝз”ЁвҖңжқҗиҙЁвҖқ(Material) дёӯзӣёеҗҢзҡ„ UVпјҢдҪҶйҖҡеёёдҪҝз”ЁдёҚеҗҢзҡ„вҖңй“әи®ҫвҖқ(Tiling)гҖӮеӣ жӯӨжҲ‘们еҝ…йЎ»дҪҝз”ЁдёҚеҗҢзҡ„иҫ“е…Ҙ UV еқҗж ҮгҖӮ
Shader "Example/Detail" { Properties { _MainTex ("Texture", 2D) = "white" {} _BumpMap ("Bumpmap", 2D) = "bump" {} _Detail ("Detail", 2D) = "gray" {} } SubShader { Tags { "RenderType" = "Opaque" } CGPROGRAM #pragma surface surf Lambert struct Input { float2 uv_MainTex; float2 uv_BumpMap; float2 uv_Detail; }; sampler2D _MainTex; sampler2D _BumpMap; sampler2D _Detail; void surf (Input IN, inout SurfaceOutput o) { o.Albedo = tex2D (_MainTex, IN.uv_MainTex).rgb; o.Albedo *= tex2D (_Detail, IN.uv_Detail).rgb * 2; o.Normal = UnpackNormal (tex2D (_BumpMap, IN.uv_BumpMap)); } ENDCG } Fallback "Diffuse" }иҷҪ然дҪҝз”ЁжҹҘзңӢеҷЁзә№зҗҶ (checker texture) жІЎжңүд»Җд№Ҳе®һйҷ…ж„Ҹд№үпјҢдҪҶдјҡиҜҙжҳҺеҸ‘з”ҹдәҶд»Җд№Ҳпјҡ 
еұҸ幕з©әй—ҙдёӯзҡ„з»ҶиҠӮзә№зҗҶ (Detail Texture)
йӮЈеұҸ幕з©әй—ҙдёӯзҡ„з»ҶиҠӮзә№зҗҶ (detail texture) жңүдҪ•ж•ҲжһңпјҹиҷҪ然е®ғеҜ№еЈ«е…өеӨҙйғЁжЁЎеһӢзҡ„ж„Ҹд№үдёҚеӨ§пјҢдҪҶдјҡиҜҙжҳҺеҸҜд»ҘеҰӮдҪ•дҪҝз”ЁеҶ…зҪ® screenPos иҫ“е…Ҙпјҡ
Shader "Example/ScreenPos" { Properties { _MainTex ("Texture", 2D) = "white" {} _Detail ("Detail", 2D) = "gray" {} } SubShader { Tags { "RenderType" = "Opaque" } CGPROGRAM #pragma surface surf Lambert struct Input { float2 uv_MainTex; float4 screenPos; }; sampler2D _MainTex; sampler2D _Detail; void surf (Input IN, inout SurfaceOutput o) { o.Albedo = tex2D (_MainTex, IN.uv_MainTex).rgb; float2 screenUV = IN.screenPos.xy / IN.screenPos.w; screenUV *= float2(8,6); o.Albedo *= tex2D (_Detail, screenUV).rgb * 2; } ENDCG } Fallback "Diffuse" }жҲ‘д»ҺдёҠйқўзҡ„зқҖиүІеҷЁдёӯ移йҷӨдәҶжі•зәҝиҙҙеӣҫ (normal mapping)пјҢеҸӘжҳҜдёәдәҶдҪҝе…¶еҸҳеҫ—жӣҙзҹӯпјҡ 
з«Ӣж–№дҪ“иҙҙеӣҫеҸҚе°„
иҝҷжҳҜдёҖдёӘдҪҝз”ЁеҶ…зҪ® worldRefl иҫ“е…ҘиҝӣиЎҢз«Ӣж–№дҪ“иҙҙеӣҫеҸҚе°„зҡ„зқҖиүІеҷЁгҖӮе®ғе…¶е®һдёҺеҶ…зҪ®еҸҚе°„ (Reflective)/жј«еҸҚе°„ (Diffuse) зқҖиүІеҷЁйқһеёёзұ»дјјпјҡ
Shader "Example/WorldRefl" { Properties { _MainTex ("Texture", 2D) = "white" {} _Cube ("Cubemap", CUBE) = "" {} } SubShader { Tags { "RenderType" = "Opaque" } CGPROGRAM #pragma surface surf Lambert struct Input { float2 uv_MainTex; float3 worldRefl; }; sampler2D _MainTex; samplerCUBE _Cube; void surf (Input IN, inout SurfaceOutput o) { o.Albedo = tex2D (_MainTex, IN.uv_MainTex).rgb * 0.5; o.Emission = texCUBE (_Cube, IN.worldRefl).rgb; } ENDCG } Fallback "Diffuse" }з”ұдәҺе®ғе°ҶеҸҚе°„иүІжҢҮе®ҡдёәеҸ‘е…үйўңиүІпјҢжүҖд»ҘеЈ«е…өйқһеёёй—Әдә®пјҡ 
еҰӮжһңжӮЁжғіе®һзҺ°еҸ—жі•зәҝиҙҙеӣҫ (normal map) еҪұе“Қзҡ„еҸҚе°„пјҢиҝҳйңҖжү§иЎҢзЁҚеҫ®еӨҡдёҖдәӣзҡ„ж“ҚдҪңпјҡжӮЁйңҖиҰҒе°Ҷ INTERNAL_DATA ж·»еҠ еҲ°иҫ“е…Ҙ (Input) з»“жһ„дёӯпјҢ并еңЁзј–еҶҷе®Ңжі•зәҝ (Normal) иҫ“еҮәеҗҺдҪҝз”Ё WorldReflectionVector еҮҪж•°и®Ўз®—йҖҗеғҸзҙ еҸҚе°„еҗ‘йҮҸгҖӮ
Shader "Example/WorldRefl Normalmap" { Properties { _MainTex ("Texture", 2D) = "white" {} _BumpMap ("Bumpmap", 2D) = "bump" {} _Cube ("Cubemap", CUBE) = "" {} } SubShader { Tags { "RenderType" = "Opaque" } CGPROGRAM #pragma surface surf Lambert struct Input { float2 uv_MainTex; float2 uv_BumpMap; float3 worldRefl; INTERNAL_DATA }; sampler2D _MainTex; sampler2D _BumpMap; samplerCUBE _Cube; void surf (Input IN, inout SurfaceOutput o) { o.Albedo = tex2D (_MainTex, IN.uv_MainTex).rgb * 0.5; o.Normal = UnpackNormal (tex2D (_BumpMap, IN.uv_BumpMap)); o.Emission = texCUBE (_Cube, WorldReflectionVector (IN, o.Normal)).rgb; } ENDCG } Fallback "Diffuse" }иҝҷдҫҝжҳҜдёҖеҗҚз»Ҹжі•зәҝиҙҙеӣҫзҡ„й—Әдә®еЈ«е…өпјҡ 
з»Ҹдё–з•Ңеқҗж Үз©әй—ҙдҪҚзҪ®зҡ„еҲҮзүҮ
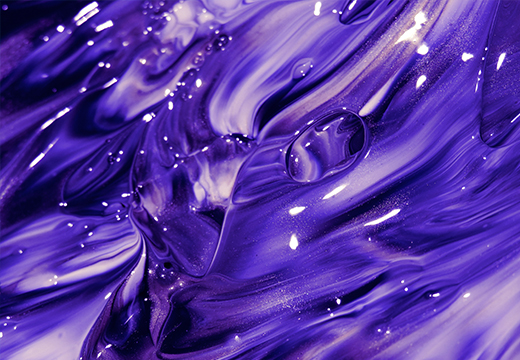
иҝҷжҳҜеңЁиҝ‘дәҺж°ҙе№ізҡ„зҺҜдёӯйҖҡиҝҮдёўејғеғҸзҙ жқҘвҖңеҲҮеҲҶвҖқеҜ№иұЎзҡ„зқҖиүІеҷЁгҖӮе…¶ж №жҚ®еғҸзҙ зҡ„дё–з•Ңеқҗж ҮдҪҚзҪ®дҪҝз”Ё clip() Cg/HLSL еҮҪж•°жқҘе®һзҺ°гҖӮжҲ‘们е°ҶдҪҝз”Ё worldPos еҶ…зҪ®иЎЁйқўзқҖиүІеҷЁеҸҳйҮҸгҖӮ
Shader "Example/Slices" { Properties { _MainTex ("Texture", 2D) = "white" {} _BumpMap ("Bumpmap", 2D) = "bump" {} } SubShader { Tags { "RenderType" = "Opaque" } Cull Off CGPROGRAM #pragma surface surf Lambert struct Input { float2 uv_MainTex; float2 uv_BumpMap; float3 worldPos; }; sampler2D _MainTex; sampler2D _BumpMap; void surf (Input IN, inout SurfaceOutput o) { clip (frac((IN.worldPos.y+IN.worldPos.z*0.1) * 5) - 0.5); o.Albedo = tex2D (_MainTex, IN.uv_MainTex).rgb; o.Normal = UnpackNormal (tex2D (_BumpMap, IN.uv_BumpMap)); } ENDCG } Fallback "Diffuse" }
дҪҝз”ЁйЎ¶зӮ№дҝ®ж”№еҷЁиҝӣиЎҢжі•зәҝжҢӨеҺӢ
еҸҜдҪҝз”ЁвҖңйЎ¶зӮ№дҝ®ж”№еҷЁвҖқ(vertex modifier) еҮҪж•°пјҢиҜҘеҮҪж•°е°Ҷдҝ®ж”№йЎ¶зӮ№зқҖиүІеҷЁдёӯзҡ„иҫ“е…ҘйЎ¶зӮ№ж•°жҚ®гҖӮиҝҷеҸҜз”ЁдәҺзЁӢеәҸжҖ§еҠЁз”»гҖҒжІҝжі•зәҝзҡ„жҢӨеҺӢзӯүгҖӮдҪҝз”ЁиЎЁйқўзқҖиүІеҷЁзј–иҜ‘жҢҮд»Ө vertex:functionName е’ҢдёҖдёӘдҪҝз”Ё inout appdata_full еҸӮж•°зҡ„еҮҪж•°гҖӮ
Here's a shader that moves vertices along their normals by the amount specified in the material:
Shader "Example/Normal Extrusion" { Properties { _MainTex ("Texture", 2D) = "white" {} _Amount ("Extrusion Amount", Range(-1,1)) = 0.5 } SubShader { Tags { "RenderType" = "Opaque" } CGPROGRAM #pragma surface surf Lambert vertex:vert struct Input { float2 uv_MainTex; }; float _Amount; void vert (inout appdata_full v) { v.vertex.xyz += v.normal * _Amount; } sampler2D _MainTex; void surf (Input IN, inout SurfaceOutput o) { o.Albedo = tex2D (_MainTex, IN.uv_MainTex).rgb; } ENDCG } Fallback "Diffuse" }жІҝжі•зәҝ移еҠЁйЎ¶зӮ№дҪҝеЈ«е…өеҸҳеҫ—иҮғиӮҝпјҡ
йҖҗйЎ¶зӮ№и®Ўз®—зҡ„иҮӘе®ҡд№үж•°жҚ®
дҪҝз”ЁйЎ¶зӮ№дҝ®ж”№еҷЁ (vertex modifier) еҮҪж•°иҝҳеҸҜд»ҘеңЁйЎ¶зӮ№зқҖиүІеҷЁдёӯи®Ўз®—иҮӘе®ҡд№үж•°жҚ®пјҢ然еҗҺжүҖи®Ўз®—зҡ„иҮӘе®ҡд№үж•°жҚ®е°Ҷиў«йҖҗеғҸзҙ дј йҖ’еҲ°иЎЁйқўзқҖиүІеҷЁеҮҪж•°гҖӮдҪҝз”ЁзӣёеҗҢзҡ„зј–иҜ‘жҢҮд»Ө vertex:functionNameпјҢдҪҶеҮҪж•°еә”дҪҝз”ЁдёӨдёӘеҸӮж•°пјҡinout appdata_full е’Ң out InputгҖӮжӮЁеҸҜд»ҘеЎ«е…Ҙд»»дҪ•дёҚжҳҜеҶ…зҪ®еҖјзҡ„иҫ“е…Ҙ (Input) жҲҗе‘ҳгҖӮ
дёӢйқўзҡ„зӨәдҫӢе®ҡд№үдәҶдёҖдёӘеңЁйЎ¶зӮ№еҮҪж•°дёӯи®Ўз®—еҮәзҡ„иҮӘе®ҡд№ү float3 customColor жҲҗе‘ҳпјҡ
Shader "Example/Custom Vertex Data" { Properties { _MainTex ("Texture", 2D) = "white" {} } SubShader { Tags { "RenderType" = "Opaque" } CGPROGRAM #pragma surface surf Lambert vertex:vert struct Input { float2 uv_MainTex; float3 customColor; }; void vert (inout appdata_full v, out Input o) { UNITY_INITIALIZE_OUTPUT(Input,o); o.customColor = abs(v.normal); } sampler2D _MainTex; void surf (Input IN, inout SurfaceOutput o) { o.Albedo = tex2D (_MainTex, IN.uv_MainTex).rgb; o.Albedo *= IN.customColor; } ENDCG } Fallback "Diffuse" }еңЁжӯӨзӨәдҫӢдёӯпјҢcustomColor и®ҫзҪ®дёәжі•зәҝзҡ„з»қеҜ№еҖјпјҡ
жӣҙеӨҡзҡ„е®һйҷ…еә”з”ЁеҸҜдёәпјҡи®Ўз®—д»»дҪ•йқһеҶ…зҪ®иҫ“е…Ҙ (Input) еҸҳйҮҸжҸҗдҫӣ зҡ„йҖҗйЎ¶зӮ№ж•°жҚ®пјҢжҲ–дјҳеҢ–зқҖиүІеҷЁи®Ўз®—гҖӮдҫӢеҰӮпјҢеҸҜд»Ҙз”Ёе®ғеңЁеҜ№иұЎзҡ„йЎ¶зӮ№и®Ўз®—иҫ№зјҳе…үз…§ (Rim Lighting)пјҢиҖҢдёҚжҳҜеңЁиЎЁйқўзқҖиүІеҷЁдёӯйҖҗеғҸзҙ иҝӣиЎҢи®Ўз®—гҖӮ
жңҖз»ҲйўңиүІдҝ®ж”№еҷЁ (Final Color Modifier)
еҸҜдҪҝз”ЁвҖңжңҖз»ҲйўңиүІдҝ®ж”№еҷЁвҖқ(Final Color Modifier) еҮҪж•°пјҢиҜҘеҮҪж•°е°Ҷдҝ®ж”№з”ұзқҖиүІеҷЁи®Ўз®—зҡ„жңҖз»ҲйўңиүІгҖӮдҪҝз”ЁзқҖиүІеҷЁзј–иҜ‘жҢҮд»Ө finalcolor:functionName е’ҢдёҖдёӘдҪҝз”Ё Input INгҖҒSurfaceOutput oгҖҒinout fixed4 color еҸӮж•°зҡ„еҮҪж•°гҖӮ
иҝҷжҳҜдёҖдёӘе°ҶиүІи°ғеә”з”ЁдәҺжңҖз»ҲйўңиүІзҡ„з®ҖеҚ•зқҖиүІеҷЁгҖӮиҝҷдёҺд»…е°ҶиүІи°ғеә”з”ЁдәҺиЎЁйқўеҸҚе°„зҺҮ (Albedo) йўңиүІдёҚеҗҢпјҡжӯӨиүІи°ғд№ҹдјҡеҪұе“ҚжқҘиҮӘе…үз…§иҙҙеӣҫгҖҒе…үжҺўеӨҙе’Ңзұ»дјјйўқеӨ–жқҘжәҗзҡ„д»»дҪ•йўңиүІгҖӮ
Shader "Example/Tint Final Color" { Properties { _MainTex ("Texture", 2D) = "white" {} _ColorTint ("Tint", Color) = (1.0, 0.6, 0.6, 1.0) } SubShader { Tags { "RenderType" = "Opaque" } CGPROGRAM #pragma surface surf Lambert finalcolor:mycolor struct Input { float2 uv_MainTex; }; fixed4 _ColorTint; void mycolor (Input IN, SurfaceOutput o, inout fixed4 color) { color *= _ColorTint; } sampler2D _MainTex; void surf (Input IN, inout SurfaceOutput o) { o.Albedo = tex2D (_MainTex, IN.uv_MainTex).rgb; } ENDCG } Fallback "Diffuse" }
дҪҝз”ЁжңҖз»ҲйўңиүІдҝ®ж”№еҷЁиҮӘе®ҡд№үйӣҫ
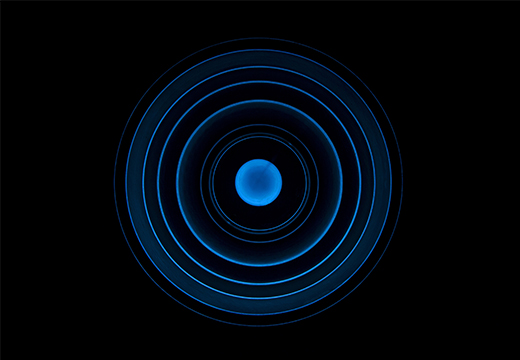
жңҖз»ҲйўңиүІдҝ®ж”№еҷЁ (Final Color Modifier)пјҲи§ҒдёҠж–Үпјүзҡ„еёёи§Ғеә”з”Ёдёәе®һзҺ°е®Ңе…ЁиҮӘе®ҡд№үзҡ„йӣҫ (Fog)гҖӮйӣҫ (Fog) йңҖиҰҒеҪұе“ҚжңҖз»Ҳи®Ўз®—еҮәзҡ„еғҸзҙ зқҖиүІеҷЁйўңиүІпјҢиҝҷжҒ°жҒ°жҳҜжңҖз»ҲйўңиүІдҝ®ж”№еҷЁзҡ„з”ЁеӨ„жүҖеңЁгҖӮ
иҝҷжҳҜдёҖдёӘеҹәдәҺеҲ°еұҸ幕дёӯеҝғзҡ„и·қзҰ»жқҘеә”з”ЁйӣҫиүІи°ғзҡ„зқҖиүІеҷЁгҖӮиҝҷе°ҶйЎ¶зӮ№дҝ®ж”№еҷЁдёҺиҮӘе®ҡд№үйЎ¶зӮ№ж•°жҚ®пјҲйӣҫпјүе’ҢжңҖз»ҲйўңиүІдҝ®ж”№еҷЁз»“еҗҲеңЁдёҖиө·гҖӮеңЁжӯЈеҗ‘жёІжҹ“йҷ„еҠ йҖҡйҒ“дёӯдҪҝз”Ёж—¶пјҢйӣҫ (Fog) йңҖиҰҒж·ЎеҢ–дёәй»‘иүІгҖӮиҜҘзӨәдҫӢиҝӣиЎҢеӨ„зҗҶж—¶иҝҳжЈҖжҹҘдәҶ UNITY_PASS_FORWARDADDгҖӮ
Shader "Example/Fog via Final Color" { Properties { _MainTex ("Texture", 2D) = "white" {} _FogColor ("Fog Color", Color) = (0.3, 0.4, 0.7, 1.0) } SubShader { Tags { "RenderType" = "Opaque" } CGPROGRAM #pragma surface surf Lambert finalcolor:mycolor vertex:myvert struct Input { float2 uv_MainTex; half fog; }; void myvert (inout appdata_full v, out Input data) { UNITY_INITIALIZE_OUTPUT(Input,data); float4 hpos = mul (UNITY_MATRIX_MVP, v.vertex); data.fog = min (1, dot (hpos.xy, hpos.xy) * 0.1); } fixed4 _FogColor; void mycolor (Input IN, SurfaceOutput o, inout fixed4 color) { fixed3 fogColor = _FogColor.rgb; #ifdef UNITY_PASS_FORWARDADD fogColor = 0; #endif color.rgb = lerp (color.rgb, fogColor, IN.fog); } sampler2D _MainTex; void surf (Input IN, inout SurfaceOutput o) { o.Albedo = tex2D (_MainTex, IN.uv_MainTex).rgb; } ENDCG } Fallback "Diffuse" }
зәҝжҖ§йӣҫ (Linear Fog)
Shader "Example/Linear Fog" {
Properties { _MainTex ("Base (RGB)", 2D) = "white" {} } SubShader { Tags { "RenderType"="Opaque" } LOD 200 CGPROGRAM #pragma surface surf Lambert finalcolor:mycolor vertex:myvert sampler2D _MainTex; uniform half4 unity_FogColor; uniform half4 unity_FogStart; uniform half4 unity_FogEnd; struct Input { float2 uv_MainTex; half fog; }; void myvert (inout appdata_full v, out Input data) { UNITY_INITIALIZE_OUTPUT(Input,data); float pos = length(mul (UNITY_MATRIX_MV, v.vertex).xyz); float diff = unity_FogEnd.x - unity_FogStart.x; float invDiff = 1.0f / diff; data.fog = clamp ((unity_FogEnd.x - pos) * invDiff, 0.0, 1.0); } void mycolor (Input IN, SurfaceOutput o, inout fixed4 color) { fixed3 fogColor = unity_FogColor.rgb; #ifdef UNITY_PASS_FORWARDADD fogColor = 0; #endif color.rgb = lerp (fogColor, color.rgb, IN.fog); } void surf (Input IN, inout SurfaceOutput o) { half4 c = tex2D (_MainTex, IN.uv_MainTex); o.Albedo = c.rgb; o.Alpha = c.a; } ENDCG } FallBack "Diffuse"}
,